Installation Guide
Share
Introduction: Refreshing your bathroom with the Wallex® Shower Panel can be done easily and quickly, without the need to call a professional. Follow the steps below for a cost-effective and simple installation process.
Step 1: Preparation Before starting, make sure you have all the necessary tools and materials. A good start is half the work!
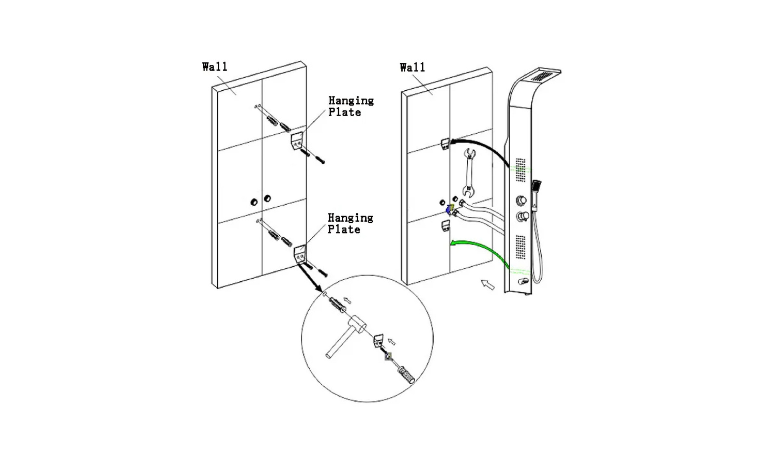
Step 2: Marking the Installation Points Use the support plates to mark the points on the wall where the support plates will be installed. Accurate measurement guarantees perfect placement.
Step 3: Installing the Support Plates Place the support plates on the wall and tighten the screws to ensure a firm installation of the shower panel.
Step 4: Connecting the Plumbing System Carefully connect the shower Panel's plumbing connections to the bathroom's water system. Check for leaks before proceeding.
Step 5: Securing the Shower Column Hang the shower column on the plates and check for stability. A stable panel is a safe panel.
Step 6: Final Check and Equipment Turn on the water supply, check for leaks and any functional issues, then install the telephone shower.
By following these steps, you will enjoy the Wallex® Shower Panel without the need for a professional, thus adding style and functionality to your bathroom.